How to screenshot on Mac?
The Mac is known, talked about, and preferred for some of its good features and functionalities. However, you may miss the ."Print" button on your keyboard (which is a workaround for screenshots). However, Apple has enabled some other keys on its keyboard to accomplish the task. There are a variety of methods (and keyboard shortcuts) to take different types of screenshots on Mac. You can use different keys to capture a whole screen or even part of it. Here is the knowledge to take screenshots on your Mac.
Ways To Take A Screenshot On Mac O/S
Method #1
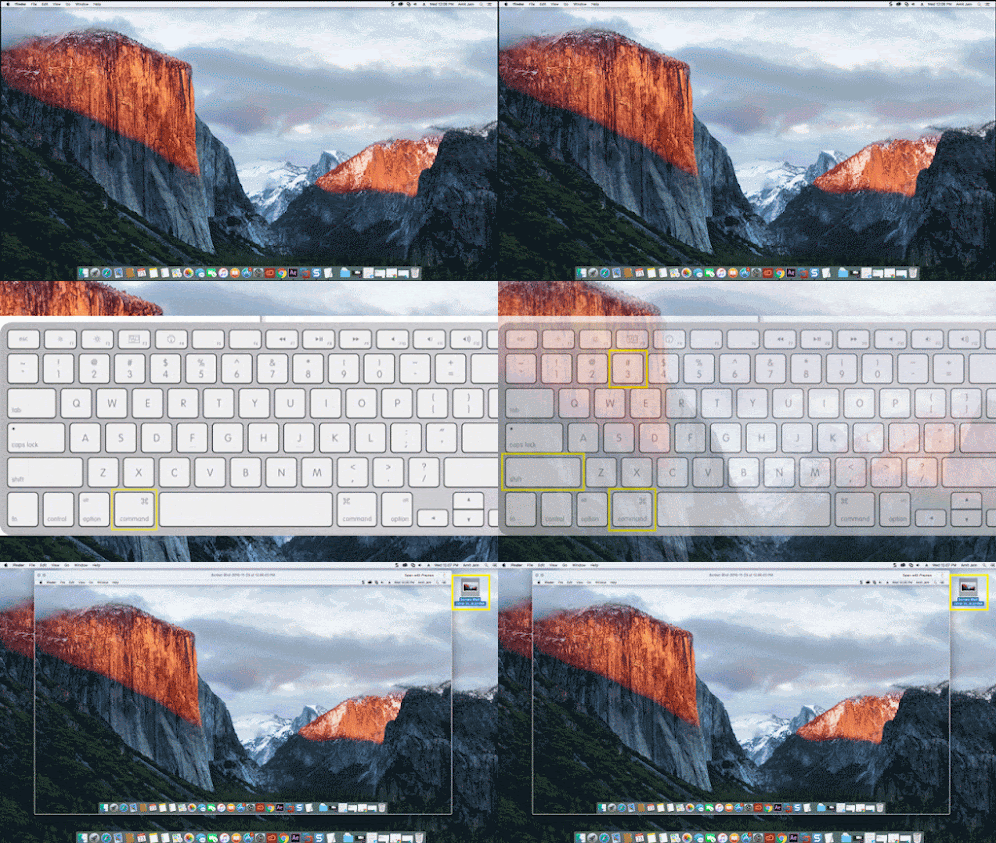
If you want to take a screenshot of the whole screen, follow these steps
- Press Command+Shift+3 keys.
- A screenshot will be automatically saved on your desktop.
- Now find the *.png file on your desktop.
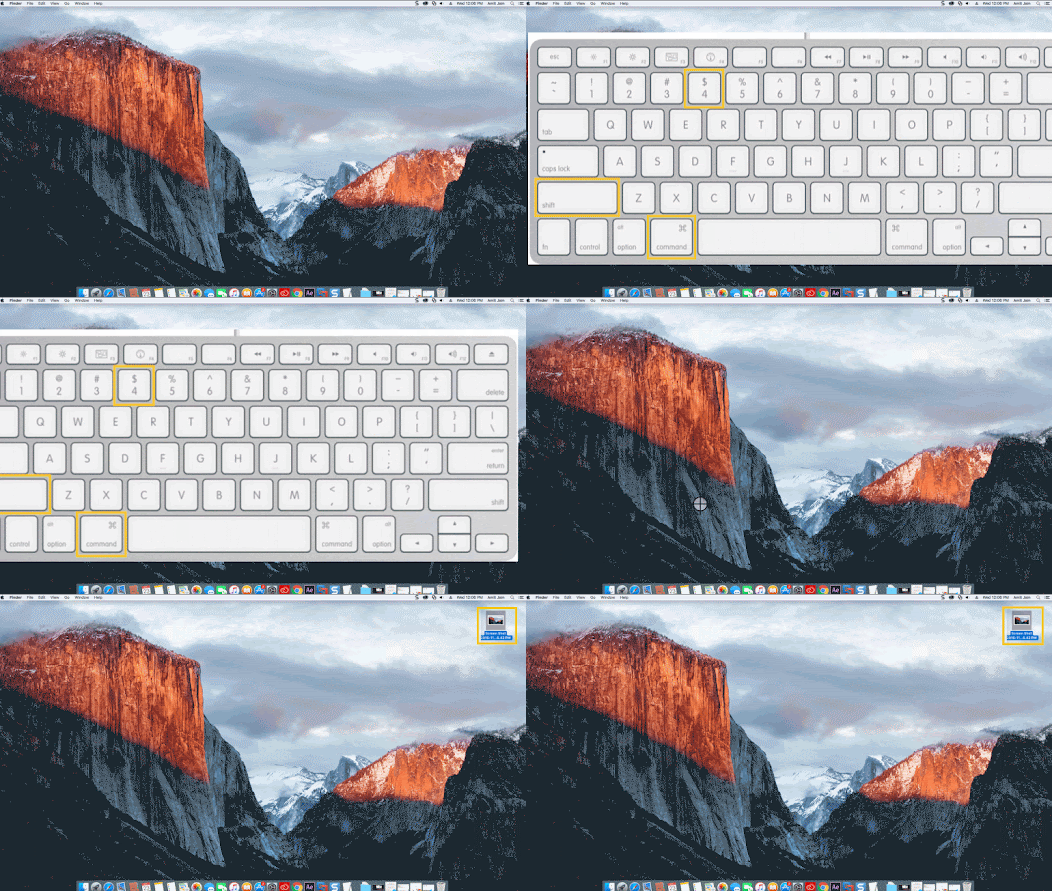
Unlike screenshots of the entire screen, you can capture a portion of it. Follow these steps to get a screenshot of part of your screen.
- Press Command+Shift+4 keys.
- This command makes the cross appear.
- Now select the area of the screen you want to take a screenshot of.
- leave the mouse or trackpad button.
- If you want to abort the operation, press the Esc key before releasing the mouse button.
- locate the screenshot on your desktop in *.png file format
- Press Command+Shift+4 keys from the keyboard.
- This command makes the cross appear
- Now press the spacebar. This turns the cross into a camera pointer.
- Move the camera pointer to the window you want to capture.
- Then click your mouse to take a screenshot
- To cancel the command, press the Esc key before releasing the mouse button.
- locate the screenshot on your desktop in *.png file format.
- Open any type of menu on your Mac, for example, the Finder menu.
- Press Command+Shift+4 keys from your keyboard.
- This command makes the cross appear.
- Now drag and select the menu.
- Release the mouse to take screenshots.
- To cancel the command, press the Esc key before releasing the mouse button.
- locate the screenshot on your desktop in *.png file format.

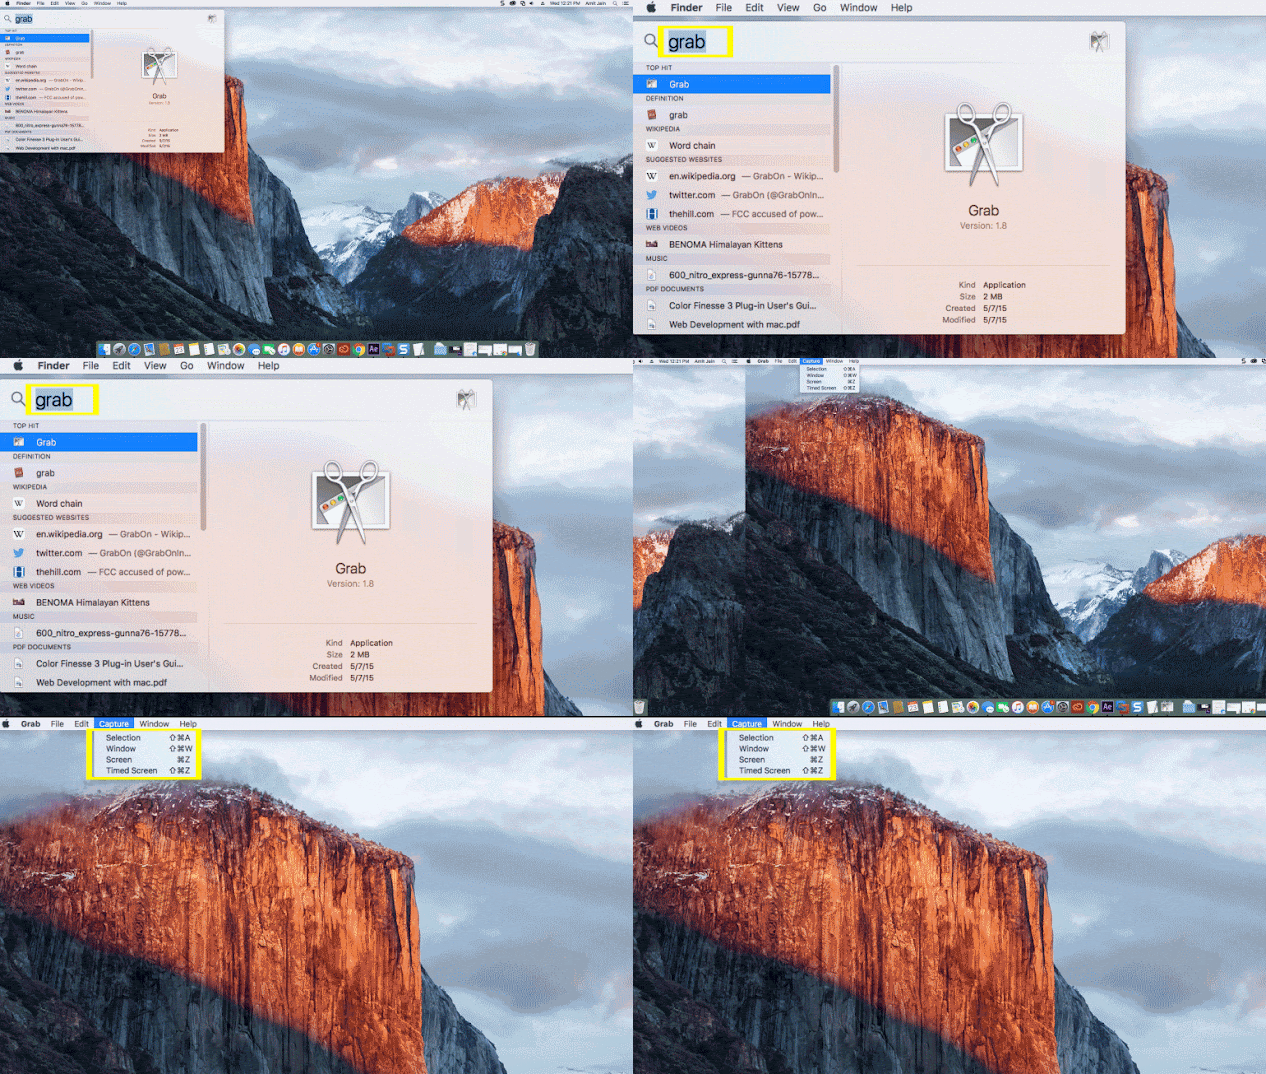
Okay, maybe you don't want to memorize all those keyboard shortcuts. Here is another app on your Mac operating system that can help you take screenshots with ease. Please.
Open the application folder. Now open the Utility folder. Find and run the Grab application. Grab will not have a dedicated window, but will work almost exclusively through the menu bar. Click the Recording tab. Now select one of these given options to take the screenshot. Grab helps you take screenshots of the screen, a single window, and even part of the screen. You must select one of the options accordingly.
Thanks to all of you please follow my blog to support me, sometimes we tired after reading the long posts and we need some entertainment so I got some entertainment for you to watch this video.


